How to Make Your Own Comic Book Furniture
We have a superhero / comic-themed guest room that’s been a work in progress for the past few years. Now that we’ve gotten the rest of the house more or less set up, the pandemic has been a perfect time to address other areas of the house. We decided to make some comic book furniture to spruce up our guest room.
The room currently doesn’t have much going on. There’s a bed, some superhero wall art, and that’s pretty much it. The only other piece of furniture was this nightstand.

It didn’t really fit with the whole aesthetic we were going for, so it was the perfect time for a makeover!
Materials:
- Sandpaper or sander
- Brushes and/or roller
- Paint (I originally tried using spray paint, but ended up getting a paint sample for better coverage)
- Modge Podge
- Comics
- Scissors
- Clear sealer (like Rust-oleum or polyurethane)
Process:
I need to take better pictures of the process next time. I was so eager to dive into this project that I forgot to take more pictures.
After removing any hardware, sand and wipe down your furniture (you can refer to my previous posts on making galaxy furniture if you need an example). Once you’ve done that, you can paint your furniture.
As mentioned above, I originally experimented with using some Krylon spray paint. I found that the coverage was rather thin and uneven. I ended up buying a Valspar paint sample ($2-4 at most hardware stores for 8 oz.) and painting over the initial spray paint. You could honestly get any brand of paint – it all depends on the color and finish you like! I used about half the paint sample (2-3 coats, 4 oz.) to paint this nightstand.

While the paint was drying, I spent some time cutting up some comic books. You can find $1 comic books at your local comic book store. This way, you feel less guilty cutting or tearing panels out. I looked for panels that I found visually interesting.
Now, just because this is a comic-themed furniture tutorial doesn’t mean you need to stick to comic books. You could use any paper-based material (sheet music, book pages, scrapbook paper etc.).

This is where I wish I took more pictures of the process. Once you’ve got your comic panels (or other material), there are a couple of approaches. You can either start gluing things down with Modge Podge, or you can figure out where you want things to go first. The general method for decoupaging is to put some Modge Podge on the furniture, stick your material on that spot, and then put some Modge Podge on top of your material.
Make sure to use thin layers of Modge Podge, and only use a little bit of Modge Podge at a time because it dries quickly. Spread it out as thinly as possible because otherwise it will dry with a raised surface. You can use a credit card or other tool to try and smooth out any wrinkles.

Once the Modge Podge has dried (I usually let it dry overnight, but it technically only takes about 20 minutes to dry), you can use a sealer for extra protection. I only used the sealer on the drawers since those seemed the most likely to get worn/touched over time. You might need to touch up some spots with more Modge Podge, but you don’t necessarily need to seal those spots again.
After sealing your furniture, you might want to leave your furniture in the garage or some other room for at least a day so there’s no more chemical smell.
Here are some close ups of the finished nightstand:

I painted the inside of the drawers black with chalk paint. However, you could also leave the inside of the drawers as is.

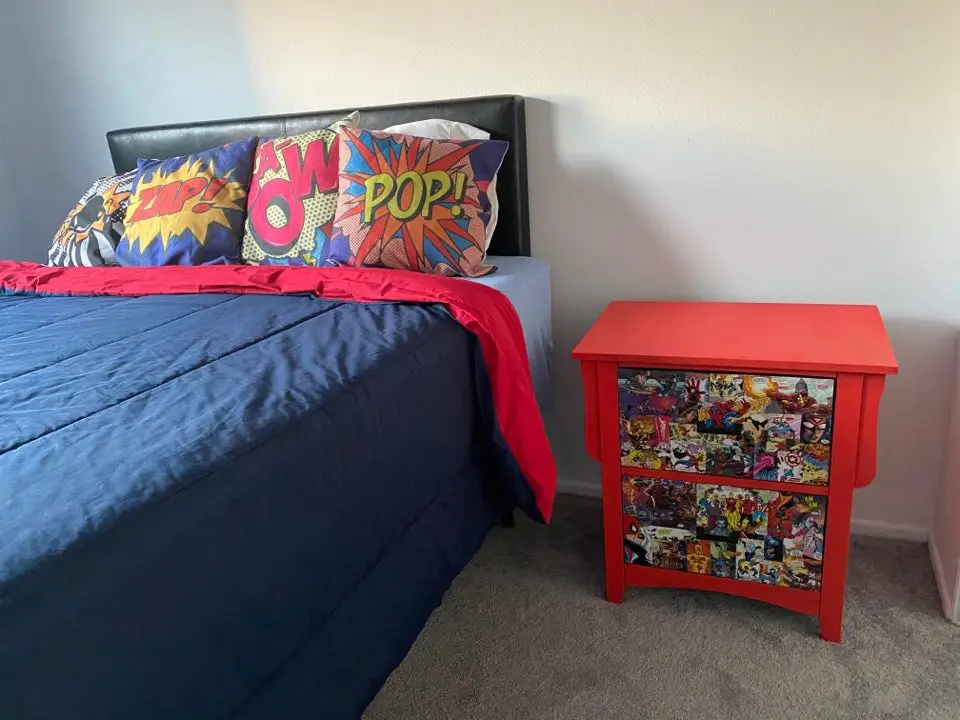
Here is the nightstand in the guest room next to the bed:

This is a fun project that could easily be done in a weekend, but you could definitely take your time with it!
Similar Posts
