How to Design a Mural Accent Wall
One of the highlights of my pregnancy was the creative process of designing our nursery. I spent a significant amount of time scouring the internet for inspiration before settling on a theme that my husband and I were both happy with. The end result is a fun and nerdy nursery, with a tranquil ambiance that suits any sex or gender. I’m planning a series of posts, beginning with the mural accent wall we created.
My husband and I had a lot of fun with this project. In total, we spent approximately $100-125 in materials and completed it over the span of a couple of weekends.
Whether you’re embarking on a nursery design or any other DIY home projects, I hope these insights into our process inspire and encourage you in your own endeavors!
Supplies:
- Brushes of different sizes
- Paint
- Rags
- Ruler/level (for straight lines)
- Projector (optional)
- Painter’s tape
- Drop cloth
Step 1: Choosing a Theme
We made the decision to transform our guest room into the new nursery. While sticking to the existing superhero theme was an option, I wanted something new. I found Pinterest to be a helpful tool for finding inspiration and creating a mood board. The real challenge came in settling on a final theme.
Initially, I envisioned a gamer-inspired nursery with colors reminiscent of the Nintendo Entertainment System (NES). However, my husband felt the gray and blacks were a bit too serious for a nursery. He suggested a Super Mario Bros themed design with vibrant greens and blues, which sounded fun but a bit too bold for my taste. (I know—that’s so wild coming from me! I felt those bright colors were more fitting for a playroom, and wanted our nursery to have more soothing and nurturing tones.)
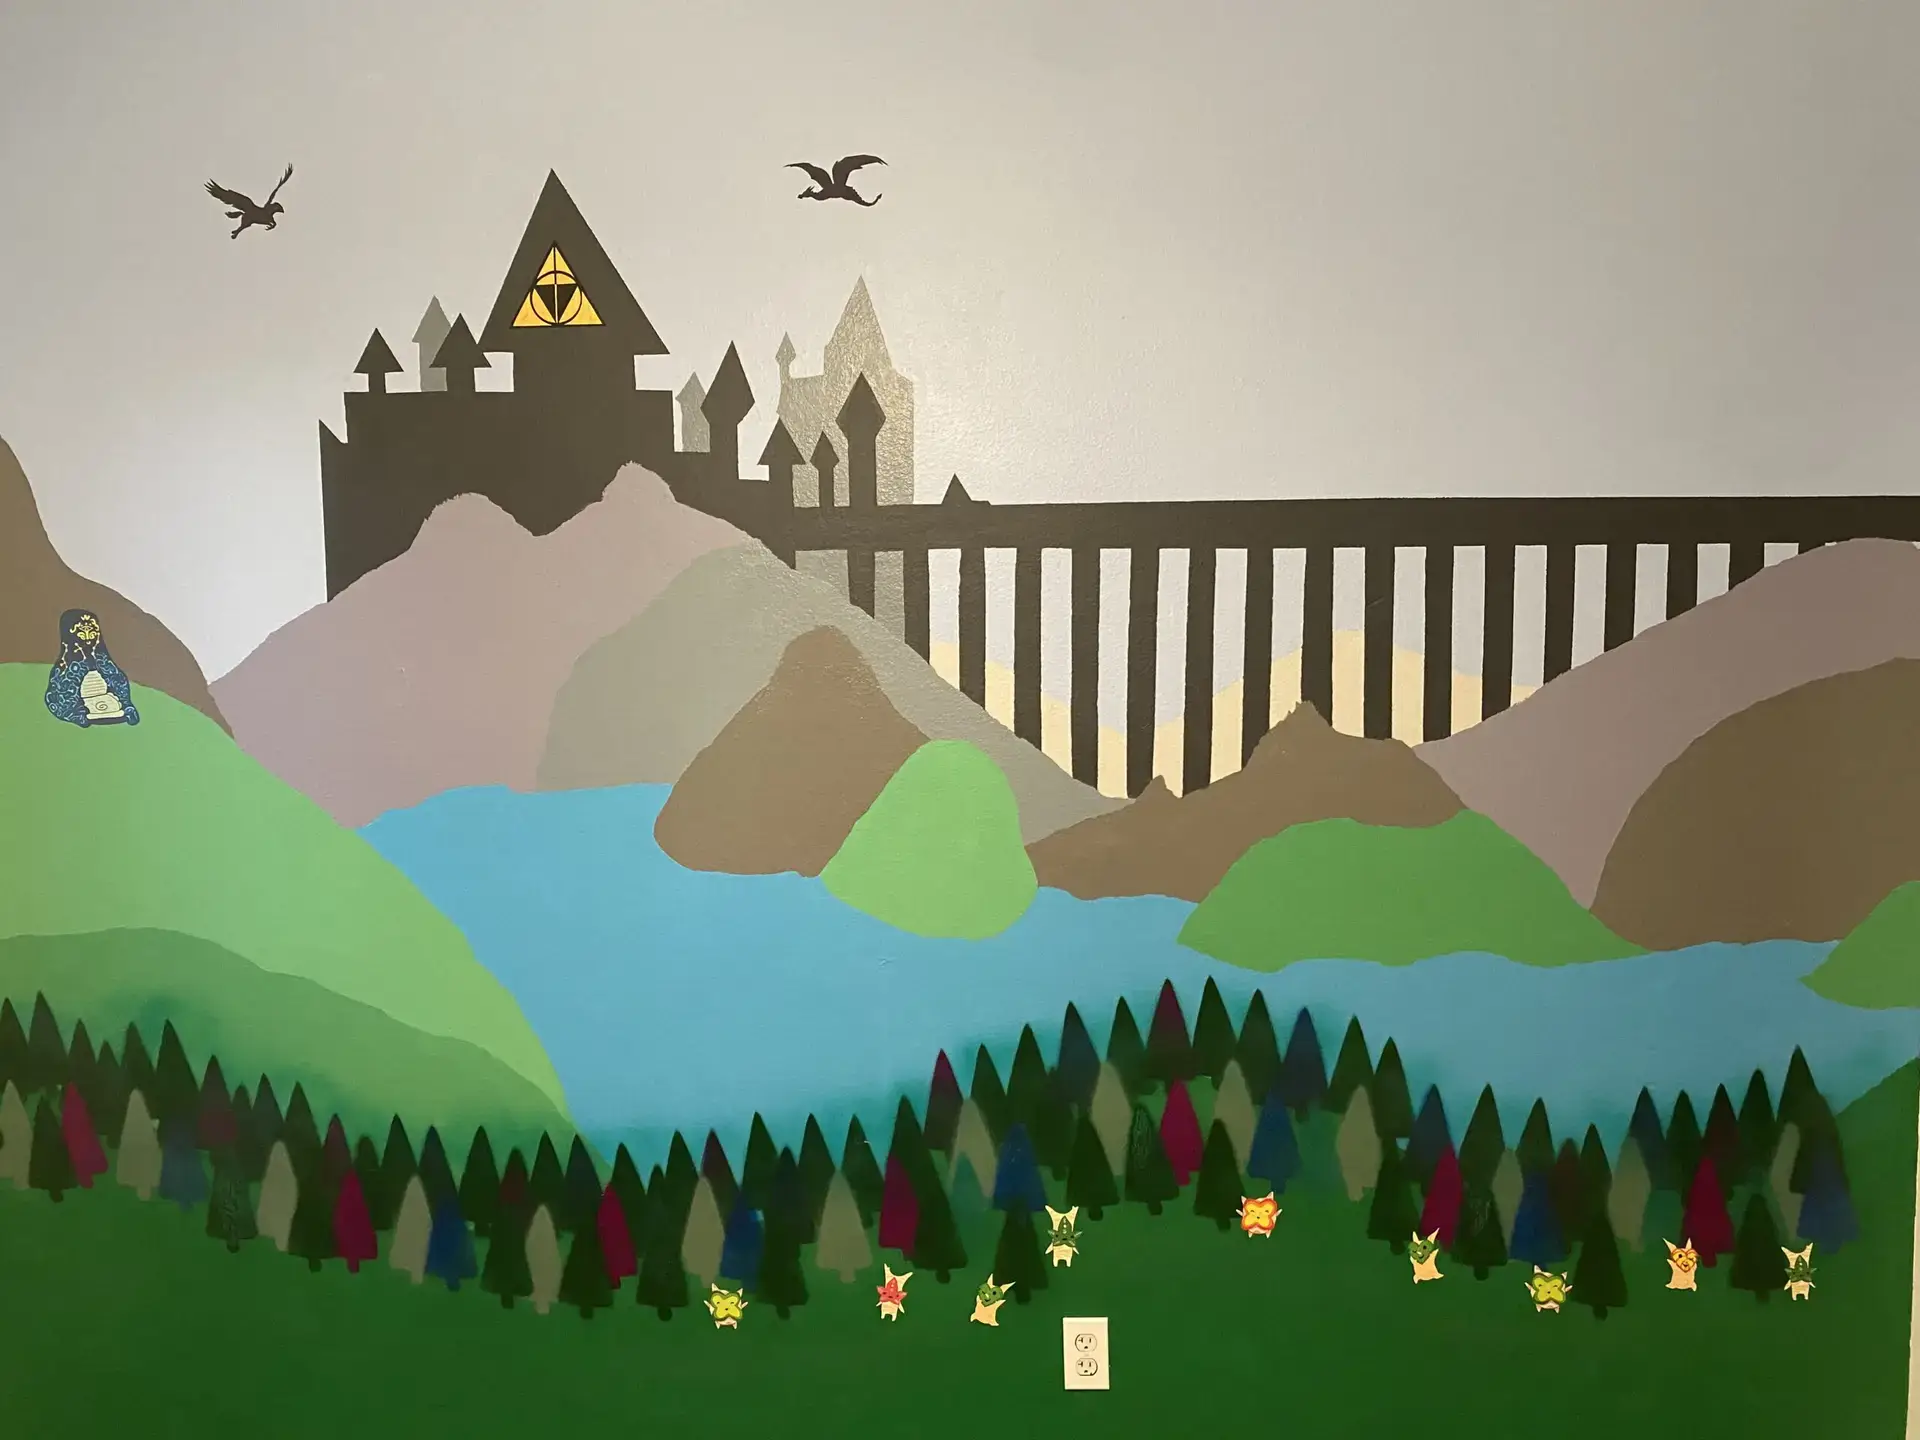
After some deliberation, we found a middle ground—settling on a fantasy/gamer-inspired theme that incorporates subtle nerdy elements from Harry Potter and Legend of Zelda. It strikes the perfect balance we were looking for.
Step 2: Sketching
Browsing Pinterest, we stumbled upon some murals featuring a castle, bridge, mythical creatures, and a forest. I liked the versatility of this design — the castle could pay homage to either Hogwarts or Hyrule, and we could incorporate magical creatures from both fandoms.

Originally, I planned to snag a cheap projector second-hand from OfferUp or Facebook Marketplace to trace a source image on the wall. Unfortunately, I didn’t get any responses.
I found a creative solution thanks to YouTube—I made my own smartphone projector using a cardboard box, ziplock bag, tape, and a sharpie. I was skeptical but it worked like a charm!

If you’re facing similar projector availability issues, consider giving the DIY route a shot—it’s easier than it looks!
Step 3: Painting
Note: Depending on your wall, you might need to do some prep work before painting. Patch any holes, paint a base layer if needed, etc.
After we finished our sketch, we chose our paint colors. To make the most of what we already had in our garage, we started with those. Then, we compiled a list of additional colors and purchased paint samples from Lowe’s.
To streamline the painting process, we assigned each color a number and labeled the different parts of the mural on the wall. Yup, you’ve got it—it was a paint-by-numbers approach. Beginning with the background colors — the sky and the hills in the distance — we worked our way forward.


Step 4: Adding Accents
Honestly, we could have called it a day after we finished painting. But I had this vision, and I was determined to see it through!
For the forest, I made a tree stencil from cardboard and used spray paint. Then, we incorporated elements from Harry Potter and Legend of Zelda into the mural. These include a dragon, griffin, Koroks, a Breath of the Wild shrine, and a symbol that combines the Triforce and Deathly Hallows.

Given the level of detail for some of these, I found it a lot easier to find some inspiration/source art and use Procreate to create vinyl sticker designs. I knew if I had drawn directly on the wall, it would have been very difficult to undo any mistakes. This was my first time using Procreate and I loved how I could easily swap out different colors.


Step 5: Marvel at Your Work
I’m pretty happy with how our mural turned out. There are a few imperfections but I think that’s part of the charm. Sometimes, I think about incorporating additional elements, maybe introducing more magical creatures or even adding clouds to the sky. But I want to leave some space for our son to make his room his own.
My husband and I share a playful joke about the future sting when our kiddo grows up and decides to paint over the mural. But, for now, seeing him smile when he looks up at the artwork warms my heart every time.
